Having lots of dowels on hand is great for any woodworker. You can buy them or you can make them. But sometimes you can't get the right size or you need one quick.
Wouldn't it be nice to make your own, very fast and many different sizes.
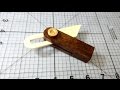
When I was making my magnetic levitating dowel I needed a 1/2 inch dowel. I could not find the right size in my stock so I had to make one. I have three different dowel making jigs but they were not accessible plus they take time to set up.
This is when I tried something different, I used cordless drill and bench vise. I was amazed how easy it worked. Then I went on to experiment with it.
The bench vise has serrated jaws and when the stock is turned in the jaws they will do the cutting. Then with the vise handle you can adjust the jaws to get the size dowel you need.
The dowels will turn to roughly the right size you need then will need a little bit of sanding. With some practice and a steady hand they can turn out pretty accurate.

Here is a stepped dowel, this is a good example of what you can make. Not too bad for a quick dowel made on a vise.
Making the dowels
The dowels are not hard to make but there are a few things that will help you:


I used my wooden miter gauge to cut a piece of 2x2. A small piece would work best since it is easiest to work with.


The tablesaw blade was adjusted to 45 degrees and all sides of the block were cut making an octagon shape.


Now it can be turned in the vise. The best way I found was to slowly feed the stock all the way through. Then slide it out, turn the vise handle a small amount and repeat until you get the dowel size you need.
If you turn the vise handle too much on a small piece the wood might twist, and on a large piece, it makes it difficult to turn.

When I had the right size I put a strip of sandpaper, reverse in the vise and carried on with the turning. In no time it was smooth and I had a good looking large dowel.


Conclusion
I couldn't believe how fast dowels can be made. I am glad I experimented with different sizes and woods.
With the right vise with the serrated jaws you can do the same. You may never have to buy another dowel. Remember to go slow and take off a small amount at a time.
Let me know if you try this and how it works for you.
See also:


Wouldn't it be nice to make your own, very fast and many different sizes.
When I was making my magnetic levitating dowel I needed a 1/2 inch dowel. I could not find the right size in my stock so I had to make one. I have three different dowel making jigs but they were not accessible plus they take time to set up.
This is when I tried something different, I used cordless drill and bench vise. I was amazed how easy it worked. Then I went on to experiment with it.
The bench vise has serrated jaws and when the stock is turned in the jaws they will do the cutting. Then with the vise handle you can adjust the jaws to get the size dowel you need.
The dowels will turn to roughly the right size you need then will need a little bit of sanding. With some practice and a steady hand they can turn out pretty accurate.

Here is a stepped dowel, this is a good example of what you can make. Not too bad for a quick dowel made on a vise.
Making the dowels
The dowels are not hard to make but there are a few things that will help you:
- The stock must be square
- must be able to fit in the drill chuck
- use a vise with serrated jaws

I always start with a piece of scrap wood for testing, most of the time this will become the final product.

A few strips are cut on the table saw, it is important to cut these square. The ends should be sanded a bit, one side to fit in the drill chuck and the other side for a started when it goes in the vise. The knots may be a problem so use only the best part of the wood.

Here I am turning the wood slow and feeding it slowly in the vise also I am using one hand as a guide.

The first two test pieces are complete, they turned out nice and I will be keeping them in my stock. I kept the knots in only to see if they would work.
Large Dowels
Okay, so it works to make smaller dowels but what about larger ones. This would really come in handy.


A center was marked on one of the ends and drilled out. Some creative clamping was done to make sure the hole would be drilled straight. I did not measure the hole but 1 1/2" would be fine.

I used a piece of dowel from the first one I made a glued a piece in the block and set it aside for a while.

The tablesaw blade was adjusted to 45 degrees and all sides of the block were cut making an octagon shape.

The dowel was placed in the drill and turned on the belt sander rounding the end, this will help later when placed in the vise.

If you turn the vise handle too much on a small piece the wood might twist, and on a large piece, it makes it difficult to turn.

When I had the right size I put a strip of sandpaper, reverse in the vise and carried on with the turning. In no time it was smooth and I had a good looking large dowel.


Conclusion
I couldn't believe how fast dowels can be made. I am glad I experimented with different sizes and woods.
With the right vise with the serrated jaws you can do the same. You may never have to buy another dowel. Remember to go slow and take off a small amount at a time.
Let me know if you try this and how it works for you.
See also: