To start I cut a 1/4" threaded rod 4" in length. Of course you can use any size threaded rod.
One end of the threaded rod is tapered using a belt sander. This was done by eye, just slowly sanding while checking for evenness.This is the end that the pencil will sit in.
The end was center punched and ready for drilling.
I like to use small bits and work up to the right size I need to fit a pencil.
The nut was center punched on both sides. One side is for the pin while the other side is for the 1/4" thumbscrew.
CA glue or crazy glue is used to hold the nail in place.
A tap and dye set is used to thread the nut. This will be for a 1/4" bolt which will be used a set screw to lock the nut in place.
Complete. It adjusts very quick and the set screw makes it easy to lock in to whatever size you need. Fits in your pocket or hang it on the wall, either way this tool is one I will keep near by.
Always looking for a piece of dowel or metal rod? A large collection of wood dowels and metal rods can get messy when it comes to storing and organizing. This dowel organizer will help keep them tidy. After easy access and picking your piece the dowels can now be tucked away.
How to make
I used 2 inch diameter plastic tube I found in the plumbing department.
At the tablesaw a stop block and mitre gauge are setup to cut plastic tubes 7 inches in length.
The next thing to do is to plug one of the ends, to do this I used my holesaw. The inside diameter of the tube is 2 inches and the hole cutter I will be using is 2 1/16".
The plywood for the plugs is 3/8".
The plugs are tapped in using a rubber mallet. The fit is very tight so it will take some pounding. When they are in they will be very difficult to get out.
To drill the holes accurately a scrap 2x4 block is made to hold the tubes.
3/8" plywood is used for the base.
I first made a test piece to see what I liked and what would work. It took me a few tries but was well worth it. When I found what I liked I transferred the measurements onto the new plywood.
Nuts and bolts are used to assemble the tubes to the plywood. A stick is also bolted to the centre of each tube which will allow it to swivel together.
It is difficult to show in photos how it works so check the video. It swivels good and now my dowels are sorted and easy to see. When I am finished the holder folds up and is neatly tucked away. See how I built the hinges for the cabinet here.
I recently started collecting model cars, I don't know much about them but know the ones I like and they are usually the ones I had when I was younger and many old cars.There is a lot to learn and I am having fun.
First thing to do is figure out the size for the compartments. After checking a few of the longer cars I found 90 cm length would work best.
I used some scraps and made some cuts with my measurements to see if the height and length would work and if everything would fit together properly. When I was happy with what I had I was ready to move on to building a larger case.
The strips were cut 50mm wide. I cut many extra strips for the case and a few for testing and the rest for future model case.
Making the notches
To make the notches I measured 90 mm from the blade cut mark and drilled a small hole then tapped in a nail. After the nail was in I cut the head off.
A second hole was drilled for the nail. It was pulled out with Nail Jack pliers, and tapped into the hole. The spacing for the holes is 46mm and 90mm.
The pieces are clamped together and cut on the table saw using the miter saw gauge with the pin. I found one clamp is all that is needed to secure the boards while cutting. I did not use a dado blade but made the notch twice the thickness of the blade.
The boards are lined up and with the help of a rubber mallet the compartments are snapped together.
Making the frame
The frame boards are cut to the right length using the measurements from the compartment boards.
A rabbet cut was made on the back of the frame before it was assembled. This will be for the backboard.
The compartment assembly fit very tight and to secure it to the frame all that was needed was to tap it in. It was a perfect fit and will not go anywhere. If your fit is a bit loose a little bit of glue will work.
After searching online for some long reach clamps I decided to make some myself. Either they were too expensive or I did not know the quality I was getting. Also making them myself let me make them the size I needed. It is so simple to screw in the pipes to the elbows. There are many size threaded rod available so check with your hardware store.
How to Make
I went to Home Depot and bought some galvanized pipe and threaded rod. 2- 18", 1- 4 1/2", 2 elbows and 1 piece of 1/2" threaded rod. The cost was around $16.00. This clamp has a throat reach of 18" and a height of 4". Later I purchased a 12" pipe and now the height can reach 11".
To start I drilled one of the ends of the pipe using a 1/2" drill bit.
With no force, glue or grinding I was lucky and the nut for the threaded rod just so happened to fit perfectly inside the pipe. The nut does not have to be secured at all since the threaded rod will line it.
All the pieces are screwed together hand tight to see how everything fits. Just screw the pipes in the elbows.... so simple. Testing the strength At this time I thought I would do some tests for strength.
I used some clamps and blocks of wood to set up the clamp. To test it I will sit on it. I weigh 200 lbs and I am sure it will hold up.
The bars held up and there was some flex. I know it could have withstood more but for my uses it will be all I need.
The Handle
I found a piece of scrap hardwood and cut it to 7 inches I then drilled the center using a bit slightly smaller than a 1/2 inch. This will be for the threaded rod and will turn tight in the handle. A little bit of epoxy will also be applied making this a strong handle.
I drilled the handle right through for the end of the threaded rod.
A slot was cut in one end of the threaded rod. This will be for a slotted screwdriver bit to turn the handle quickly.
The threaded rod was put in the handle with the slotted side keeping flush on the end and epoxied together.
Making The Pad
A swivel pad is made using plywood. First was drilled then cut on the bandsaw. See more details on the video.
A washer is placed in the cup, this will help for friction and also prevent wear on the wood.
The washer and cup are epoxied and clamped together.
Another wood pad is glued onto the wood block. This pad can be easily trimmed off and replaced with a new pad.
I purchased another pipe, this one was 12 inches. With so many different sizes available you can pick whichever size suits your needs.
The long reach clamp works great on the table saw.
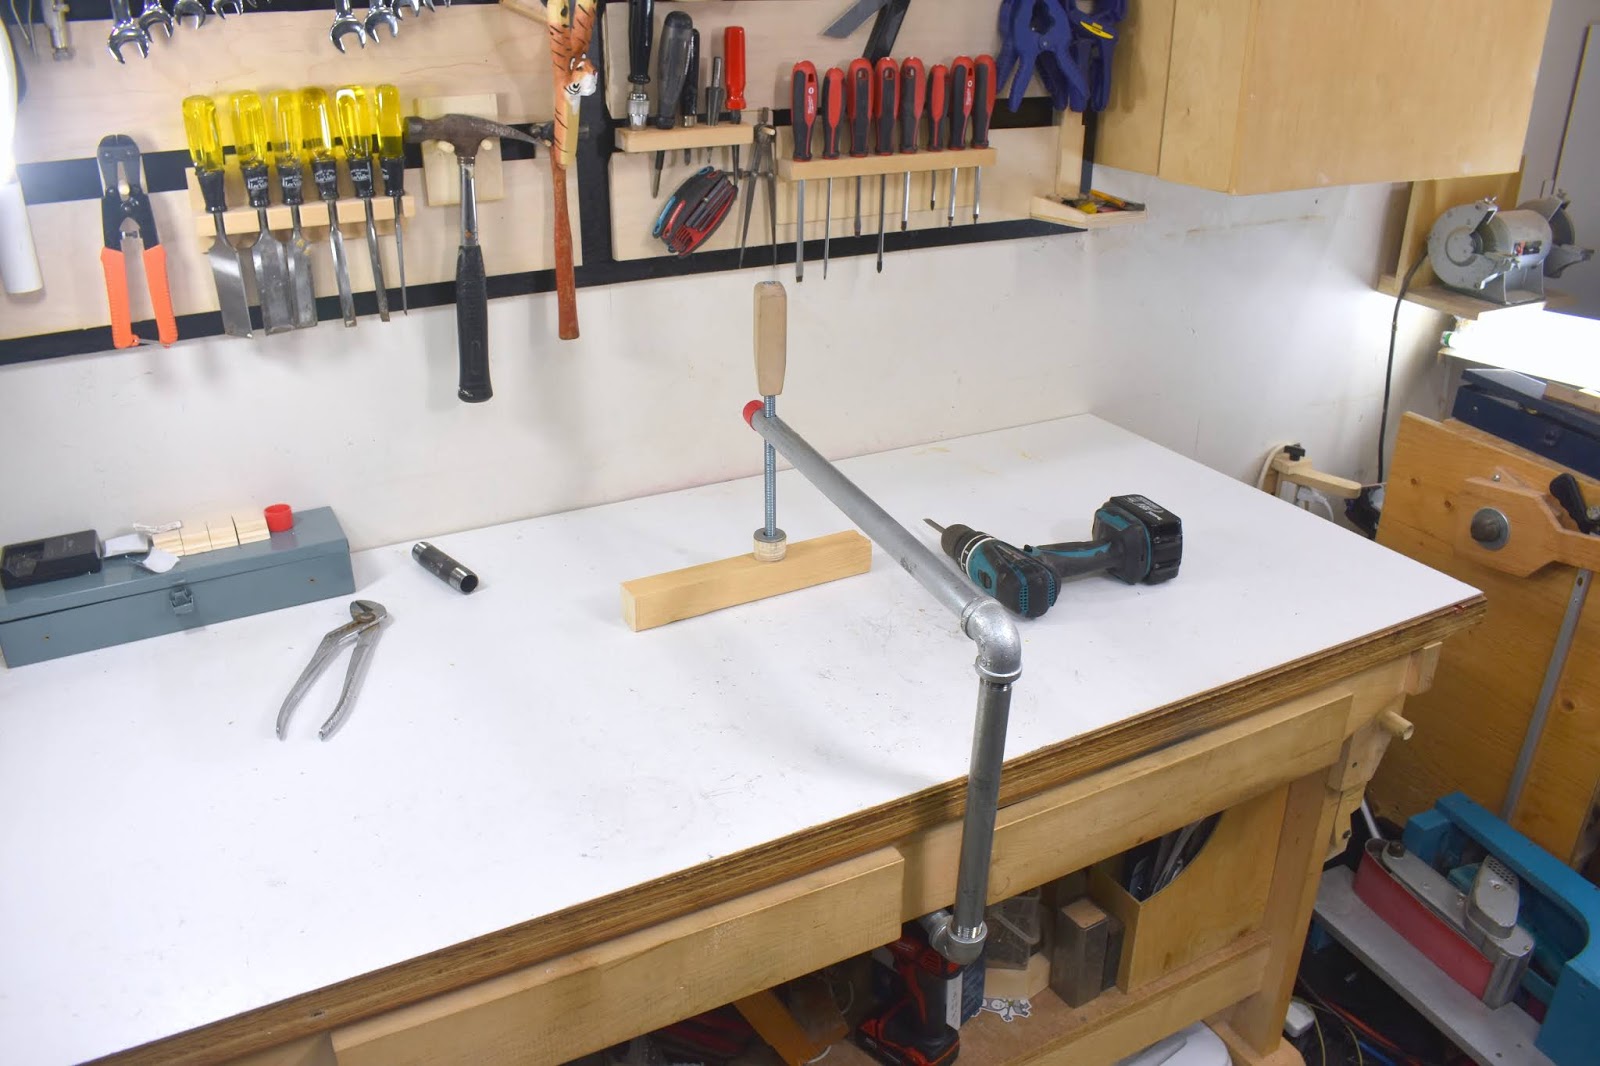
I changed the height of the clamp using the longer threaded rod and was now able to use it on my workbench.
Conclusion
This clamp was easy to make and very inexpensive. You can also change the length and width of the clamp buy buying different size pipes. The deep throat or long reach clamps come in handy in the shop and are ideal for hard to reach areas. Making the clamps is easy enough even if you all you have is a drill and some basic woodworking skills.