Monday, January 29, 2024

Magnetic tool ring


    I came up with this idea for a new tool, I call it a tool ring. A wooden ring with rare earth              magnets. This ring fits comforabley on your finger and can be used to hold small tools,            hardware and also for picking up small parts.


    I used my magnet sepaerater to get a 3/4" rare earth magnet.


   A 3/4 forstner bit will work for the magnets as well as the finger holes for the ring.


To start I found a small piece of hardwood, I made sure one side was square and scribed some lines using my mini speed square . 


  I drew the rough shape of the rings and cut the rough shape on the  bandsaw. The rest of the  shaping was done on the beltsander with 80 grit paper and the fine sanded by hand using 220 grit..  

   Here one is rough and one is sanded. Very easy once it it shaped on the beltsander with a      good eye and fine sandpaper.


I used some gorilla glue for the magnets, after they are dry I used some fine 

sandpaper to clean any glue residue.


    Here I put on a few screws and a drill bit. Not only does it hold well it also held up when            I was working on a project. 


   Here is a video showing how I made it:


Friday, April 21, 2023

Folding Ziplock bag storage case


Ziplock bags are a great tool for storage as they are easy to use, versatile, and affordable. Here is how I made a storage rack for the workshop for small tools and parts.

The one cool feature is that it folds down into the door so everything tucks away neat and tidy.

Label the bags with the name of the item this will help you identify the contents of each bag easily

Using ziplock bags for storage is a convenient and efficient way to keep your belongings organized and protected.


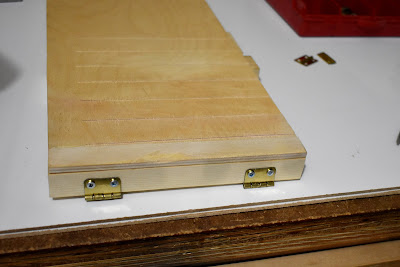
To start I used some 3/8th inch Baltic birch, the dimensions are 6"x 15.5"  


I cut 7 slots in the lid to fit the length of the ziplock bags which is 5.5". I first tried on the table saw but the blade was to thick so the bandsaw worked fine but you have to take your time to make sure you get nice straight cuts. 


A block is glued on one end,  this will be for the hinges as well as a spacer for the ziplock bags to hang when the lid is closed.

Hinges can now be put on the block. 


    A lid prop was made on the table saw, I first laid down a piece of  wood and slowly raised the blade until I got the desired length for the  slot. I repeated this a couple time to make it wider for the screw that would slide in the slot. 


A hole was drilled in one end and that will act as a catch for the prop so it will lock in the open position. Here I rounded the ends,  I also used a round file and some sandpaper to clean everything up.


\\
I attached a small block for the lid prop, a few holes were drilledZiplock bag storage
 so it could be screwed onto the door.


I will put the ziplock storage case inside the door of  my cabinet with wooden lock.                                              


The hinges are first screwed in the door then I had to find the best placement for the lid prop block to be screwed into the door. I found the right spot so when the lid was opened it was at 90 degrees and when closed the lid prop and lid closed neatly.


See also


   Tool caddy                                                                         Tool wall       


Wednesday, April 5, 2023

Woodworking for Beginners

Woodworking for beginners


 Starting woodworking can be a fun and rewarding hobby or even a potential career. Here are some steps to get started:

  1. Learn the Basics: Research and study the basics of woodworking. Watch videos, read articles, and study the different types of woodworking tools and techniques.

  2. Choose Your Tools: You don't need to buy all the tools at once. Start with a few basic tools and add more as you progress. A circular saw, a jigsaw, a drill, and a sander are some essential tools to begin with.

  3. Find a Space: You need a space to work in that has good ventilation and adequate lighting. A garage, basement, or outdoor shed can be an ideal location.

  4. Start with Small Projects: Begin with small and simple projects like a birdhouse, a jewelry box, or a cutting board. This will help you develop your skills without becoming overwhelmed.

  5. Learn from Experts: Consider taking a woodworking class or workshop to learn from experts. They can provide guidance, tips, and techniques that can improve your skills.

  6. Practice Safety: Woodworking involves sharp tools and heavy machinery, so it's essential to practice safety measures to avoid injuries. Always wear protective gear like goggles, gloves, and earplugs and follow the manufacturer's instructions for each tool.

Remember, woodworking is a process that takes time and patience. Don't be afraid to make mistakes and learn from them. As you practice and gain experience, you'll become more skilled and confident in your abilities.


10 tips for new woodworkers


  1. Choose the right type of wood for your project: Different woods have different properties, such as strength, durability, and appearance. Choose the type of wood that suits your project's requirements.

  2. Use sharp tools: Using sharp tools makes the job easier and produces better results. Dull tools can be dangerous and can damage the wood.

  3. Measure twice, cut once: Take accurate measurements and double-check them before cutting the wood. This will save you time and money by avoiding mistakes.

  4. Plan your cuts: Plan out your cuts before making them. This will ensure that you get the right shape and size of the wood.

  5. Sand carefully: Sanding is essential for a smooth finish. Use sandpaper with a fine grit and work your way up to coarser grits.

  6. Use clamps: Clamps are essential for holding the wood in place while you work on it. Use clamps to secure the wood to the workbench or table.

  7. Use safety equipment: Wear safety equipment such as eye protection, gloves, and a dust mask when working with wood.

  8. Practice good ergonomics: Use proper posture and body mechanics to avoid injuries and strains while working.

  9. Maintain your tools: Keep your tools clean and well-maintained to ensure they work properly and last longer.

  10. Practice patience: Woodworking is a slow and precise process. Be patient and take your time to get the best results.

Sunday, November 27, 2022

Fork N Wood


          Here is my Fork in Wood, I also made a wrench in wood. When you are finished your friends will keep guessing on how it was made, unless they watch the video. I have one on my desk and people walk by and don't get it, lol. 

          With good woodworking skills and materials you can make one too. 
          Lining in up properly and gluing it tight will hopefully give you a 
          flawless piece.              


      This was my first quick attempt and I was so pleased how it turned out I could not see and crack lines.


      To start I just used some regular 2x4's, I made sure there were very few knots or if I was lucky none at all.  I cut a few extras so I would have lots to work with.


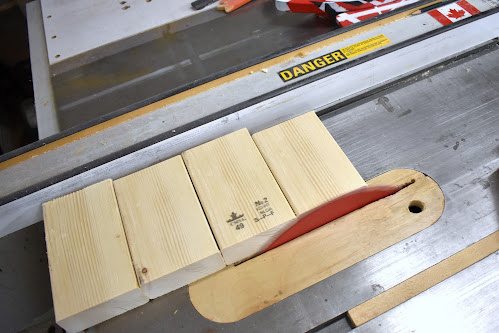
              I cut them roughly 2 1/2"x 4" and 1/2" thick using my new pushsticks . 
              Any size would work, whatever looks best.


                    Next step is to put them in the vice, and the big reveal is to snap them. I used a  block and a hammer and hit it hard enough to snap in half. Hopefully it will break along the grain.


                Here I got my caliper and measured the thinnest part of the 
                 fork handle and matched it with the right size drill bit.


                      When I clamped the two pieces together I could not even see the
                       crack line so I had to take it apart and make a mark so I knew where 
                      to drill.


                        Here the piece is held with my hand and you can not see any lines at all.


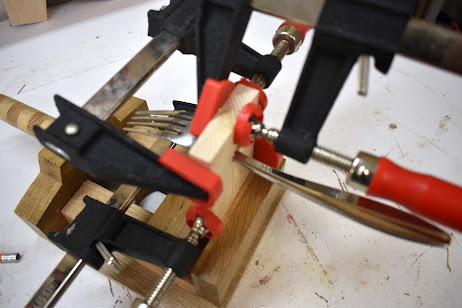
                             Careful clamping is done  to make sure everything is lined up and                              tight together.


                                The wrench is clamped and looks messy with the glue squeeze out 
                                but that is fine. After it was sanded it turned out flawless with no                                            evident lines.


                        I used another piece of 2x4 to make the base. First I dado 
                         cut the centre  and 45 degree angle cuts for the sides.  


             See Also


                                    Wood ring through glass bottle video! Check this one 
                                 out, I put a oak ring through a glass bottle.


Sunday, November 13, 2022

 Push Sticks with Notches


I made a set of push sticks that I have been testing out and like the design, and the colour. They are 3/8th inch thick but I will make a new set that is 3/4 inch. They will be stronger and better for safety. As for the colour, they look cool and I will never loose them in my cluttered shop.

They have two notches, one to hold the wood firm against the fence and the other notch to hold the wood flat so it doesn't flip up. 


This is the first one I made, it looks good and works good but it should be stronger.

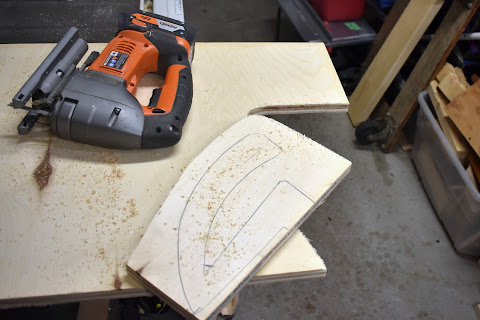
I traced my original onto 3/4 inch plywood and made a few modifications. I also traced a few extras so I would have spares since they do get chewed up on the table saw.


The easiest way is to first cut them with the jigsaw then clean them up on the bandsaw.
After they are cut I used some 150 grit sandpaper to smooth the edges, this is all you need. You can router if you like but sanding by hand is fast and will give you a comfortable feel.


A quick spray booth was made using some cardboard and a frame was made with some scraps.
Some I-hooks are put in the push sticks. Two holes were drilled in the frame for  two wires. They are loose and can be easily rotated for spray-painting 


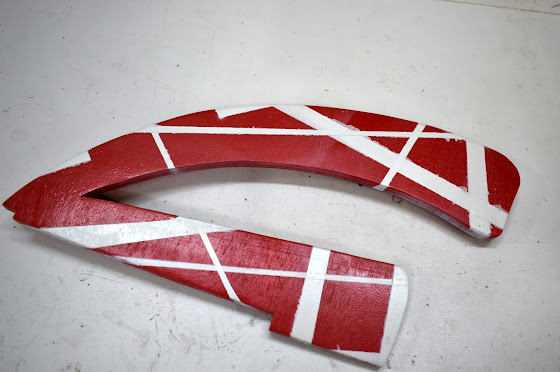
After some primer tape was put on the pieces pieces. They  were put on randomly, whatever I thought looked cool, then proceeded with black paint.


After the black I taped it again and then painted the red.


Here is the final push-stick. I like the notches for keeping the wood firm to the fence and flat on the table. Its a good idea to trace out a few extras right away since they will get chewed up. 

After a few test cuts I am happy the way they turned out.


See Also 


                    Make a try-square                                                                                                            
                     Mini speed square