
I made this simple jigsaw table for my shop. It is very basic and can be made using your cordless drill, jigsaw and a few other simple tools. You can go to your Home Depot and get them to cut the base top and sides to the right dimensions.

I made the base and top 11"x 15". The height is 11". The box is inset to the base 2" this is to help with clamping the unit on a workbench or other table.
You can make the first part of this table and clamp it to a table or workbench and use it right away. Or you can carry on and make the box.


The magnets are very strong and after a few tests I knew they would work fine.

Three sides are screwed together to make the support for the top. Remember to always use the right size drill bit for the screws or the wood will split.

With the jigsaw the corners can be rounded, this looks better and now there wont be any sharp edges. I did this only to the top since this is the work area.


 Large wood clamp Mini bevel gauge
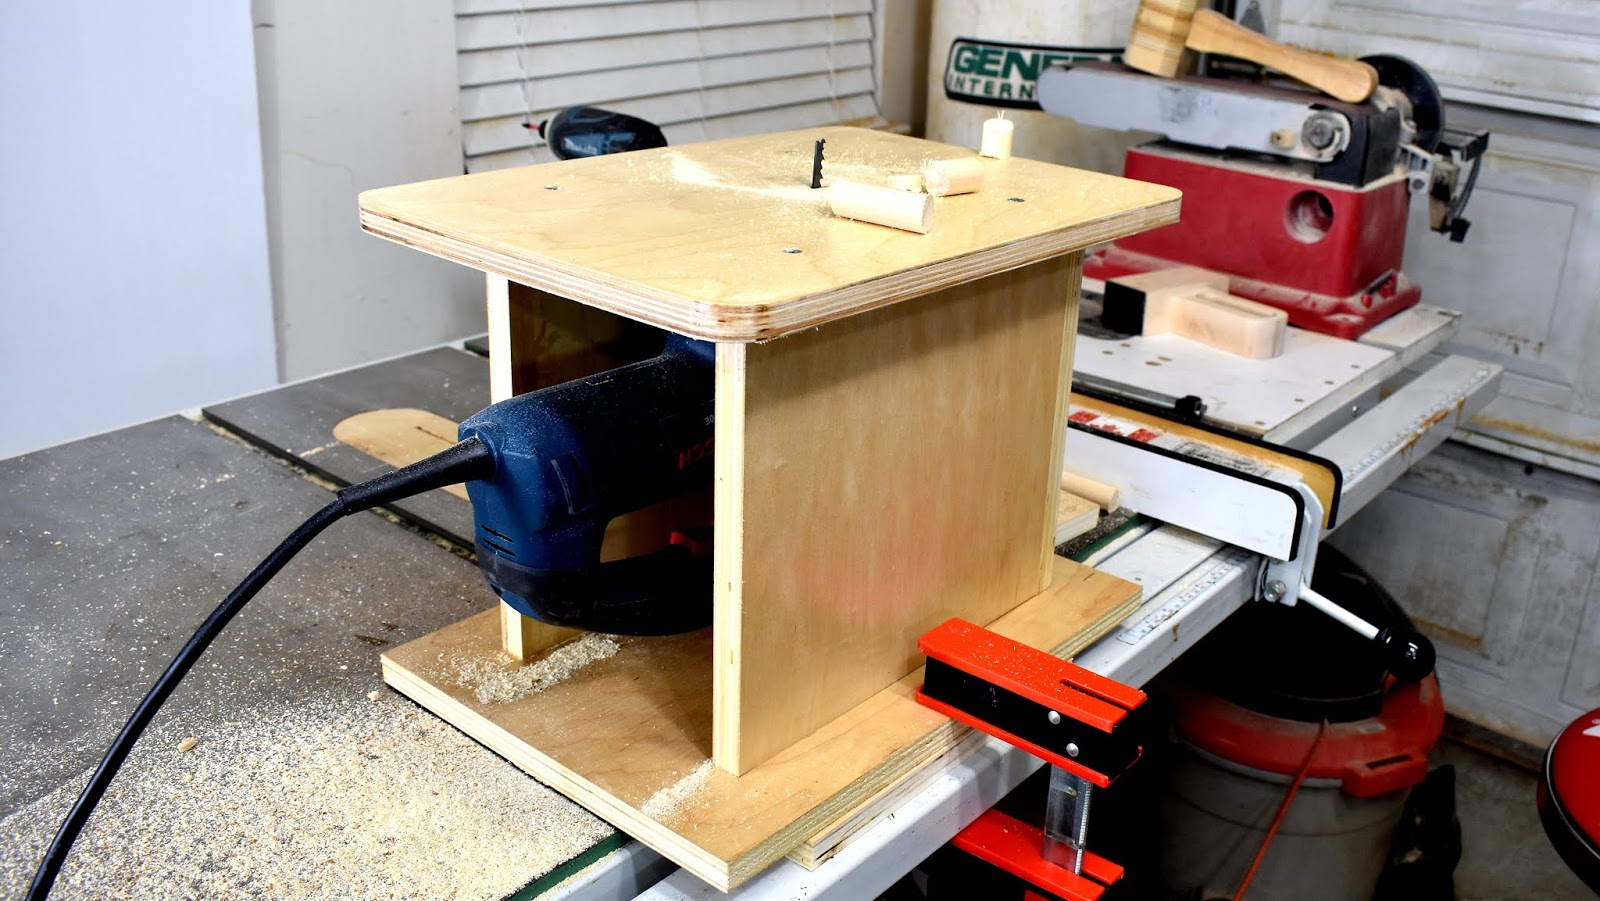
I made the base and top 11"x 15". The height is 11". The box is inset to the base 2" this is to help with clamping the unit on a workbench or other table.
You can make the first part of this table and clamp it to a table or workbench and use it right away. Or you can carry on and make the box.

Here are a couple blocks, they will be for support/guides for the jigsaw. Four holes are drilled using a countersink bit.


Using a ruler carefully measure and mark the position for the blocks.
First screw on one of the blocks then put down the jigsaw and firmly place the other block on and screw it in. The jigsaw should now feel secure with no side play.

I can make the mark for the blade. To do that I found an old blade and cut it so it would fit even with the bottom of the jigsaw. This made the marking so simple.

The slot was drilled out using a 11/32nd drill bit.

Cupped 1" magnets are now installed. These are available from Lee Valley, they have a countersunk screw hole in the center of the magnet which makes them easy to install or remove.

These are very strong earth magnets so you must be careful, I made a video of a simple magnet separator which will come in handy.

A front block is drilled on, this will act as a stop guide when the jigsaw is put in the box and also helps with removal.

The magnets are very strong and after a few tests I knew they would work fine.


With the jigsaw the corners can be rounded, this looks better and now there wont be any sharp edges. I did this only to the top since this is the work area.

Screws are countersunk and put on the top. I then put on a few coats of Polyurethane. After it was ready I made many test cuts using different types of wood such as hardwood, softwood and dowels.
Everything turned out great, I was very pleased with the table. Caution should be taken when using the table. Since pieces are not clamped the upstroke of the blade can lift the workpiece so you always have to hold the pieces firm.

See Also:


