Friday, July 22, 2016

Make a deadblow wooden mallet

Hammers are a very important tool for any woodworker. You can get by by using a regular claw hammer and a block of wood but for convenience a wooden mallet would be handier.  


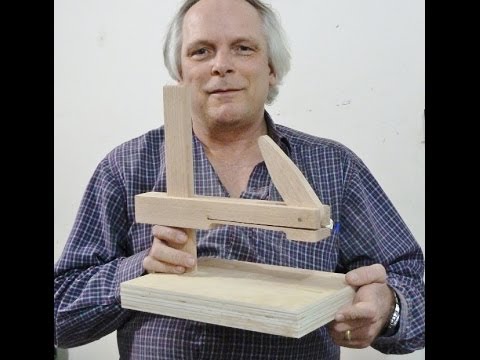
A basic wooden mallet is probably one of the easiest things to build and does not take a lot of experience or material. You can build a simple one or a more fancier one.  Here I will show you step by step how I built this wooden dead blow mallet. 


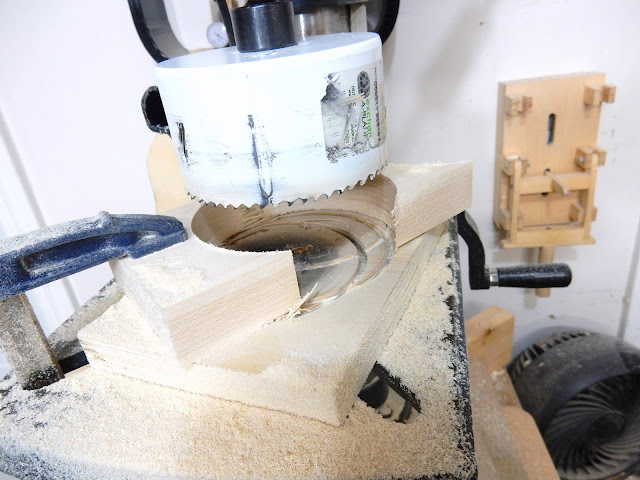
To start I will use a 3 1/2" hole saw and  cut some hardwood and plywood disks. They will be glued together to make a cylinder. 


With a hand screw clamp the disk shown below is clamped to the drill press table and a smaller size hole saw is used. This will make a ring and will be for the lead weights that will be added later. This has to be done for two of the disks.                                                                                                


Here are all the pieces and the clamping system to make the hammer head.


I placed the threaded rod in my wooden clamp and started stacking and glueing the disks together.                                                                                         
                                                                                           
  15x 14 gram weights are placed in each of the 2 rings, this will add just about 1 pound to the hammer.                                                                                      


The pieces are numbered to make sure they stayed in order while glueing.


After three disks and the weights are put together I will  wait for the glue to dry so I set it aside. This was just a precaution, I wanted to make sure everything lined up properly before I carried on.                                                                                                  


Now the rest of the disks are glued and clamped together. They are set aside until the next day.                                                                                                     


                                           Since I used a threaded rod for clamping I was able to mount it to the drill press and clean it up with some sandpaper. The base is a block of wood with a small metal cup that fit the threaded rod.


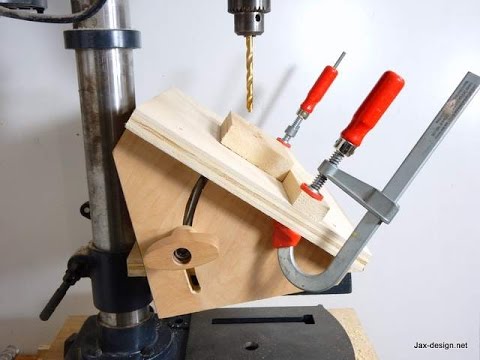
I saved the center of one of the rings and used it to mark the top of the cylinder.  This will be a guide so I know where not to cut. I will cut in 4 sides of the hammerhead to give it a nicer shape.   


A quick jig was made with some cheap plywood. Also see the small wedge, this will help keep the cylinder from rotating.


After the first cut a square was used to cut the opposite side. I continued until I had four sides. This gave the hammer head a whole new shape.


For the hammer handle I will be using a piece of old pallet. I don't know what kind of wood it is but it is a hardwood and when it was cleaned up it turned out very nice. 


To make sure everything would be kept square I used a  miter gauge, first to cut the length which is 1 ft, and then to cut some marks for the dado cut. 


A bandsaw was used to cut some slots, these will be for the wedges. Also the sides were cut to give it some shape.


 Off to the router to round the edges.


The head is glued on and some hardwood wedges are cut and hammered into the handle. 

Since the ends had the threaded rod it left a small hole. This was easily filled in with a small piece of dowel and glue. The ends were later trimmed and sanded smooth.


Varathane is used for the finish


For a test I thought I would try hammering square pegs in round holes. I used hardwood oak and a piece of fir. A couple of good whacks with the new hammer and they went in. 


The hardwood enlarged the holes and forced them to a square. I cleaned them up with some sanding and was very pleased with the result.


Conclusion                                                                 

Hammers are a must for any workshop and a wooden mallet will come in handy more than you think. They are easy to make and you can come up with your  own design.

Dead blow mallets are very interesting. With the added weight they give a harder hit and there is little to no bounce upon impact.  Plus they have a good feel to them.

I put varathane on for the finish except for one of the faces. Being a hammer I thought it would ruin the finish pretty quick. I will find out soon enough but let me know what you think?  


See also:                                                                                                

small workbench                           Self centering drill gauge                             Make a try square                                                                                         


Friday, July 8, 2016

Homemade Large Clamp


Woodworking clamps come in many shapes and sizes and sometimes you never have the right size. Having large clamps is handy so I wanted to build something different, I wanted it to be large, strong and have a long reach. 

To build this strong clamp steel and maple will be used and when i'm done I will give it a good test.


The jaws will be mounted on flat bar and the one end with the handle will have a swivel pad for full contact on uneven or sloped surfaces.


Material list


  • hot rolled steel , 1 1/4x 3/8" L= 22 inches
  • maple 1x6  3 feet.
  • threaded rod- 5/8" L= 8 inches
  • coupling nut
  • set screw 1.5"
  • wooden ball 1 1/2" diameter          


Lets begin

 A piece of hot rolled steel can be purchased from your local metal mart. I got six feet and it cost around $1 a foot. It's alway nice to have some leftover in the shop for future projects.

Using a hacksaw a piece was cut 22 inches long.


The new caliper which I made last week was used to measure the pieces of maple for the clamp jaws. They  are cut to a length of 11 1/4 inches.
These calipers are sure getting a lot of use. 


Dado cuts are made in only one side of top jaw and bottom jaw. The other side is not cut, this will help keep it stronger.


 I used  my homemade mitre gauge and set it to 2 degrees and cut the dado. This is done only with the bottom or sliding jaw.


A test with the bar and it is a good fit.  It has a little bit of play and that will be good for the sliding and locking screw as we will see later.


Gluing the blocks                                                                                                  

With the bar in I glued the blocks together, if it is a tight fit it may be very difficult to remove the bar later. 

It happened to me so what I did is cut a small piece of the bar around 8 inches long and had to use a sledge hammer to pound it out. A few good whacks and it will come out.


One of the ends of the bar will be mushroomed before it can be epoxied to the fixed jaw. This will help give it more support in the fixed jaw. 

A sledge hammer and a vise are used to swedge the bar end. 


 After the glue is dried and the bar is removed a hole is drilled for a coupling nut for the threaded rod.   


A chisel was used to square the hole for the nut. 


This hole in the sliding jaw is for a set screw to help lock on the bar.


 How to build a wooden swivel pad                                                                                             

To start I will drill a hole in a 1 1/2" hardwood ball. This will fit a 5/8" threaded rod. Simply place the ball in the centre of the drill press table and with a screw clamp hold the ball and drill about halfway through the ball.


Next step is to cut some square pieces of plywood and drill a hole in them slightly larger than the ball. This will make a box to contain the wooden ball.


All the layers of plywood are stacked and glued together. The ball with the rod is put inside and the last piece of wood with a smaller hole is glued on making the swivel pad. 


  The threaded rod is put into the coupling nut through the jaw  and now the handle can be epoxied on. I don't think I will be able to take it apart now.

Check out how the clamp is sitting, I am sure that will come in handy for some clamping job.


The swivel pad and handle....
The handle was made from a piece of fir. It was drilled using a bit the same size as the threaded rod and glue together with epoxy.


Here is a view of the set screw and the bar. One end of the bar was roughed on  the belt sander with 50 grit sandpaper.


A test breaking a piece of 1.5 x 2 inch board                                        

I made this setup to test the clamp, I wanted to see how it would snap a good size piece of wood. After I clamped it together I was turning the handle and it took quite a bit of strength to break it. The clamp passed the test and  I now have a good idea on its strength.  


Conclusion

It is always fun to make your own tools, and sometimes they can turn out better than store bought tools. 

After testing this clamp I know it will come useful in the shop. It has a long reach and the jaws open to over one foot. oh and the swivel pad.


What do you think of the size or the strength? Have you made any clamps? Let me know or show me a photo.


You may also like:

     Angle drilling jig           Table clamp                   Wood clamp