Here are the two squares I use the most in my shop, a speed square and a mini machinist square. I thought I would combine the two and that's how I came up with the idea for a mini speed square.
To make the square I cut a piece of maple to a thickness of 1/4 inch.
This can be used for the triangle and the lip.
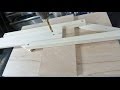
I made a few of these so I used different types of wood. To cut the triangle I used my table saw sled and my speed square. I just held the piece firmly and cut a few triangles.
For the lip for the square I cut small strips 2 1/2" in length. I then glued them to the triangle.
Although it was not necessary I wanted to add a triangle in the middle, this can be used for sliding the square along a piece of wood and produce a straight line parallel to the edge. The inner triangle is 1/4 inch and 1/2 inch from the edge.
I drilled three holes and then carefully chiseled out a triangle in the middle of the piece.
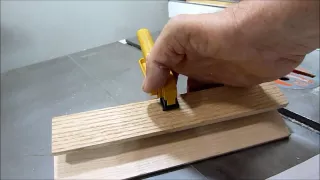
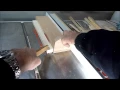
Here I am testing the square for accuracy.
The square can be used as a guide for a jigsaw, the saw will cut accurately 90 deg and 45 deg as I show in the video.
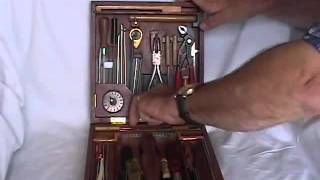
I made a tool caddy for my work bench for easy access to most of the tools I use frequently. This made good sense since I am forever reaching for my tools in different tool cases and then putting them back.
Start by cutting the ends from a piece of solid oak. I still have some hardwood flooring left over so that is what I will use.
For the body three pieces of 2x4 around 9" in length are stacked together but not glued yet. Using a spacer for the middle block I tested the ends to see what looked best.
When I saw what I liked I used Titebond , glued and clamped the body for a couple hours.
Pattern of the ends.
To make a nice shape on the ends I first cut some angles with the band saw and then sanded on the belt sander. I find this way easier than to set up my table saw.
For the curves I first used a Forstner bit then bandsaw and cleaned up with router and some sanding.
The ends are now ready to be put on. I drilled three holes on each end and with wood screws screwed one into each 2x4.
I laid out my tools and with my marking gauge marked where I needed to drill. This way everything stays in line and looks neat.
I drilled the holes paying close attention to the diameter and depth for each individual tool.
Tool Caddy finished and sits neatly on my work bench ready to use.
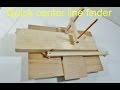
I built this Height Gauge a while back and it works great but now I want to build another gauge for micro fine adjusting. I will use a dial indicator and be able to adjust to 1/1000th of an inch.
To start I use a piece of 2x4 oak and cut a 3 1/2 inch length on my miter sled.
To make a small cove I trace it with my hole saw and will move on to the drill press.
After marking I cut it on my drill press, this can be a bit tricky because it is not a full circle so the block has to be braced firmly.
I did mine by hand but a clamp may work easier.
Next I mark and drill the center for the stem of the dial indicator.
With the band saw I notch out the bottom.
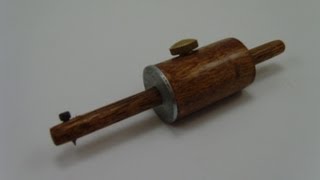
Everything is cut and I put in the dial indicator. A small set screw was installed to keep the dial secure.
A foot was also added to the spindle for more surface to touch the top of the blade.
.jpg)
.jpg)
.jpg)
.jpg)
.jpg)
.jpg)
.jpg)
.jpg)


.jpg)
.jpg)
.jpg) For the body three pieces of 2x4 around 9" in length are stacked together but not glued yet. Using a spacer for the middle block I tested the ends to see what looked best.
For the body three pieces of 2x4 around 9" in length are stacked together but not glued yet. Using a spacer for the middle block I tested the ends to see what looked best..jpg)
.jpg) Pattern of the ends.
Pattern of the ends..jpg)
.jpg)
.jpg)
.jpg)
.jpg)
.jpg)
.jpg)
.jpg)
.jpg)
.jpg)
.jpg)
.jpg)
.jpg&container=blogger&gadget=a&rewriteMime=image%2F*)
.jpg)
.jpg)