Friday, February 27, 2015

2015 Kitchen Utensil  Build Challenge -
Utensil Holder  


I did not know what to make for the 2015 Kitchen Utensil Build Challenge but I knew that I wanted to try make something using my new Spline jig  so I thought I would make an utensil holder and came up with this decorative box.


    A friend of mine dropped off  some some oak pallet wood last week. It had a few nail holes so instead of filling and sanding I just cut them out.


Then I cut 4 pieces for the sides, they were  4  1/2 x 5 inches.


 With the blade set to 45 degrees I cut the pieces for the sides of the box,  for details on how I glued the box together see the video, I also did this on my last video. Both videos used a different clamping method.


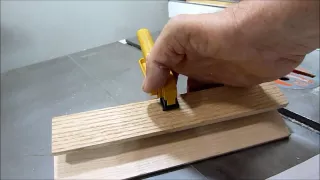
With the box glued together I first carefully measured and used a test piece to make sure all the cuts were exact. I did not want to mess up the work that I have done so far.


 Slowly cutting.....


 Now to cut the middle section, I was worried something would go wrong but it was very easy.
Just measure twice... use a scrap test piece and
go slow.


A strip of dark hardwood is first cut on the table saw at 45 degrees then cut to small triangles on the band saw.


The box is sitting in a V-block and the triangle blocks are glued and a weight is placed on top to clamp them.


After the glue has dried I use the band saw to trim the triangle blocks. It is then taken over to the belt sander and sanded smooth. 
The last thing to do is put on a bottom. I just traced out a piece from the inside and cut it on the band saw. With some glue this will be a very snug fit.


The utensil holder turned out nice and sits in the kitchen. I am very happy with my spline  jig (plus). It does a great job and cuts accurately. I am now ready for  my next project.
Don't forget to check out all the other participants in this build challenge.

I am now on  Facebook come and say "Hi".


See also:

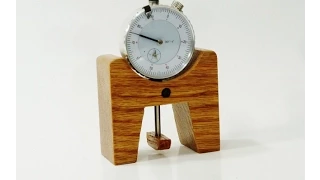
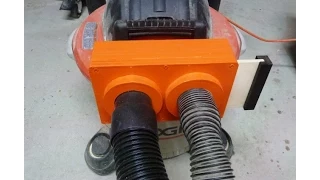
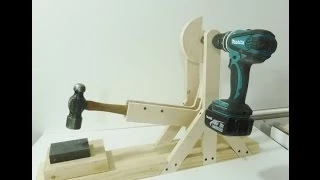
          Height gauge                        Multi blast gate                            Bookend challenge


Friday, February 20, 2015

Spline jig with an adjustment stop


                                        This is an easy to make jig and gives me really  accurate
                                         and interesting  cuts. I do have a couple other  sleds but
                                        none like this. Here is a step by step on how I made it.                                              


                                Here is my Spline cutting jig I designed in July 2014. It was made
                                very simply by using a piece of 2x4, piece of plywood and a runner. 
                                The stop block I made slid along the top and was clamped into 
                                position. This is worked very nice but I thought I would like to
                                make an adjustable stop block and upgrade this jig.


                                       I will start by making a rail that will be attached to the front 
                                      base of the sled.


                                      The sled is turned over and the rail  is attached to the sled, first 
                                       drilled then countersunk and screwed together.


Baltic birch is used to make a block which will slide on the rail...


                                         I use my miter gauge to cut the pieces. The sandpaper
                                         holds the wood firm giving me exact clean cuts.


                                         The blocks are tested for fit and ready to be glued
                                         together.


                                          Everything fits nicely and slides along the rail.


                                         A strip is added to the block that will ride on the top
                                        of the v-track.


                                          The blocks are drilled to fit a threaded rod.


                                        A T-nut is installed on this end for the rod, this will
                                        move the block when the rod is turned.


                                         Nuts are put on the right side. There is two on each
                                        side of the block and tightened having a locking effect
                                         so the rod will turn freely in the hole.


                                         A handle is made using a wheel and a dowel. The dowel
                                         is drilled and a nut and  bolt are used so the dowel spins
                                         freely.


                               I test a piece using a scrap 2x2 and am happy with the results.
                              Some are cut at 45 degrees and some at 90. I also sampled different
                              spacing. 


                                                  Now I will make a small box, I cut
                                                  some 3/8" Baltic birch and cut them
                                                  at 45 degrees.


                                           Glue is spread on the four pieces and tape is
                                          used to hold it together.


                                         Waiting for the glue to dry.........


                                         The cuts were easy to make and I did not have to
                                         clamp anything. After I cut four sides I turned the
                                         handle 8 times and cut again. This was done 7 times.


                                          Splines are glued in.....


                                          .....the splines are now carefully trimmed with the
                                          band saw and sanded smooth with a belt sander.


      Box complete and looks good, and I have many other designs in mind, if you have any
      suggestions for designs let me know.


 see also:

Leonardo da Vinci hammer                Make a screwdriver                           Make a table clamp


Sunday, February 8, 2015

Spray can rack


                I am always trying to clean and organize my shop so I thought I would work on my
                paints and spray cans. I wanted to make a small shelf where I can fit some of my
                most used cans. This shelf will also hang on a door giving me more wall space.  


                                    To start I will use what I have in my shop so this  project 
                                    won't cost me a  cent. I found some rough looking aluminum
                                    flatbar, 1"by 1/8" and 3 feet long and cleaned them up using 
                                   steel wool.  


                               They are placed in the vise and with a machinist square and I
                               make sure everything is lined up..


                               ...  the bar is carefully bent to shape, the thickness of the door
                                which is 1 1/2"


                                I rip a scrap 2x6 for the shelves and frame.....


                               ...and with my table saw sled  I cut some dados. I did not want to
                               install my dado blade so I use my regular blade and slowly cut
                               measuring often to get the right thickness.


                               I dry fit the rack and put in some cans to see what looks best
                               and then use my dowel stop gauge to make a mark for the
                               second shelf.


                              I can now clamp the rack and with a glue and sawdust mix I fill
                              some of  the gaps. There were only a few but it is always nice to
                              take care of this right away. Late this can be cleaned up with a
                              chisel and sandpaper.


                               The rack was placed on the table saw and a few more dodos
                               were cut for some small strips. These will make a small fence
                               for the cans.


                               The bars are drilled, countersunk and placed on the rack
                               ready for the screws......


                                .....four screws are added. The countersinking will keep the
                                screw heads flush with the bar.


                               The rack is easily hung on the door and  now I can decide which 
                               cans I use the most. Having a small rack with only a few cans keeps 
                               things tidy and if ever I want, I can hang it on the other side of 
                               the door.


See also:


               Key cabinet                                                                   Paper holder                                                                                                                 
                                                                    

            Make a photo frame                                                  Making a mini drill press