When it comes to measuring in your shop you can't beat a caliper. I have several and use them all the time. Calipers are accurate and precise and can be locked at any distance.
I even built myself a 28 inch Caliper , it was one of my first videos so it was not very good but the caliper is very good and I still use it.

I will build another one, this one will be around one foot long and I came up with an idea to modify it. The main scale will be able to lay flat on a surface and the sliding jaw will move freely. This will let you use it similar to T- square and you will be able to mark things easier.
Start with some maple
Preparing the jaws
With the ruler in the slot I found the best location for the jaws and traced them on. I used my large caliper as a template.

The small jaw could not be taken off the large caliper so I just fliped over the large jaw, traced part of it and got basic design as shown below.

I cut both jaws down the middle to thin them down a bit. The 2 pieces of the small jaw will be glued back together later.
I even built myself a 28 inch Caliper , it was one of my first videos so it was not very good but the caliper is very good and I still use it.

I will build another one, this one will be around one foot long and I came up with an idea to modify it. The main scale will be able to lay flat on a surface and the sliding jaw will move freely. This will let you use it similar to T- square and you will be able to mark things easier.
Start with some maple
It is best to use hardwood for this project it is harder to work with but will withstand a lot of abuse and last a long time.
A thin strip was cut, but I cut it larger than I needed because it makes it easier to work with, then when I have what I like I will trim it down later.
A dado blade was used to cut a slot in the wood and this was cut the exact same width as the ruler. I made a very precise cut so it would fit very snug in the slot.
Now the sides of the ruler can be cut, I set the blade to 10 degrees.
This operation can be done easier using a router but I did not want to set it up. I can do the same job on the table saw but it is more difficult.
If you take your time and carefully measure you can do the same.
A chisel was used to clean the slot. As it was being cleaned the ruler was inserted and tested regularly to make sure the fit would be perfect.
A perfect fit.......
With the ruler in the slot I found the best location for the jaws and traced them on. I used my large caliper as a template.

The small jaw could not be taken off the large caliper so I just fliped over the large jaw, traced part of it and got basic design as shown below.

A hole is drilled in the large jaw for a set screw. This will be a lock for the caliper.
Putting it together and how it works
The caliper is complete. A close look at the backside shows how it will work. The set screw is for locking. The set screw was hard to turn in the hole which is good all it needed was some lubricant. I added some micro fine teflon powder and it worked great.
Tip- Never use oil on wood it attracts dust and dirt and turns gummy, then it will not lubricate.
The small jaw will work like a T-square and the large jaw is flush with the ruler and will be able to slide freely.
In the video I show how accurate the caliper is and use a digital caliper for testing.
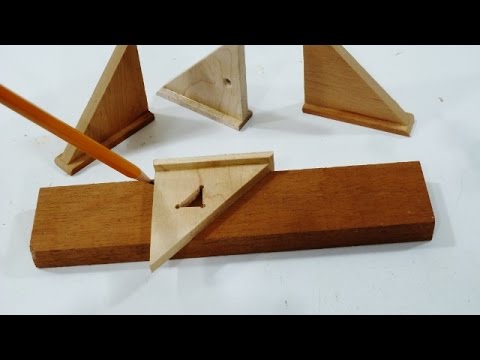
I also marked these 2-6 inch squares very fast and accurate.
Conclusion
Calipers are a must have tool for any shop. For me, I will be using these all the time. Personally I think they are a big improvement.
I hope this article and the video can help you build your own.
See also


Great production as usual. Clear, well lit pictures. Great ideas.
ReplyDeleteThanks, I hope they help.
ReplyDeleteIf you have large capacities of cutting work and you search out for a motorized saw insufficient for the purpose of cutting, then selecting the option of plasma cutting is considered the well- balanced and perfect decision to make your work easier. More Information
ReplyDeleteعمل جميل جداً انت مبدع
ReplyDeleteوالصور واضحة
Dry Cleaning Junction is known as the best dry cleaners in london. providing top-quality garment care with fast and reliable service. We handle every fabric with precision to keep your clothes looking fresh and spotless. Choose us for trusted and affordable dry cleaning across London.
ReplyDelete