
.jpg)
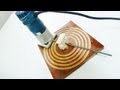
I built this Height Gauge a while back and it works great but now I want to build another gauge for micro fine adjusting. I will use a dial indicator and be able to adjust to 1/1000th of an inch.
.jpg)
.jpg)
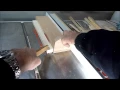
To make a small cove I trace it with my hole saw and will move on to the drill press.
.jpg)
I did mine by hand but a clamp may work easier.
.jpg)
.jpg)
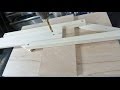
Next I mark and drill the center for the stem of the dial indicator.
With the band saw I notch out the bottom.
.jpg)
.jpg)
Everything is cut and I put in the dial indicator. A small set screw was installed to keep the dial secure.
.jpg&container=blogger&gadget=a&rewriteMime=image%2F*)
A foot was also added to the spindle for more surface to touch the top of the blade.
See also:
circle cutting jig Table saw jig for edge banding Self centering drill press jig
F844B3036C
ReplyDeleteTakipçi Satın Al
Whiteout Survival Hediye Kodu
Para Kazandıran Oyunlar
Tinder Promosyon Kodu
Dude Theft Wars Para Kodu
808A83B74C
ReplyDeleteGörüntülü Seks
Whatsapp Şov
Canlı Cam Show