Thursday, November 20, 2014

Multi blast gate box for vacuum


I use my shop vacuum for some of the machines in my shop and thought it would be easier to leave hoses attached instead of switching them  back and forth so  I made this multi blast gate. The gate slides easy even with the vacuum on.


To make a box I first  take  some measurements. I place a hose in the vacuum cleaner and use a Wixey gauge to get the angle and it is 14  degrees.....

....and the diameter of the hole is 2 1/4 ".


The box is made  of  scrap 3/4 "plywood I find in my shop. I cut four pieces to  8 1/2"x5".


A drill press is set up with guides and an angle of 14 degrees. I am now ready to drill the hole using a 2 1/4" hole saw.


The piece is tested and fits nicely into  the vacuum. Now the rest of the box can be built.


To cut the two inner pieces I first drill a hole large enough to fit  the jigsaw blade then continue to cut the pieces for the box.


The pieces are laid out and ready for gluing. I use Titebond and clamp it and let it set overnight.


For the front  I use one of the pieces of plywood and this time lay it flat and drill  two holes again using the 2 1/4' hole saw, these will be for the hoses.


The front is screwed on just in case the unit has to be taken apart.
The gate is cut to size and fits perfectly in the slide.


I drilled and cut some rings for the face of the unit. They are glued on the box and will  give more support for the hoses.
 Ready for paint...

This is the back side with the hose connecter masked up.
The gate has a hole drilled in only one side at 2 1/4". When it slides in the box the hole lines up exactly to the right side hole. A small piece of wood with a dado cut was glued onto the end of the gate for a good grip.


The hoses are attached to the vacuum and the other ends to the bandsaw and drillpress. Both work great and the gate makes it easy to switch over from one machine to another.


See also:

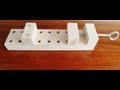
Dust collector arm                              Make a clamp                                     Table saw safety stop


Wednesday, October 29, 2014

Knife switch


For Halloween I made a knife switch and put it in the laundry room for now. It will eventually go into my shop. The switch is attached to the wall over the light switch and is fully functional. It makes a creepy wooden sound and the kids love it.

It is a fairly easy build although it may take a few tries to line it up to the wall switch. I hope the video helps if you want to build one. 

 You can see the calendar in the room is set to October.   Happy Halloween!!


In The video at 4:30 a ball starts rolling all by itself. SPOOKY!!!


See also:


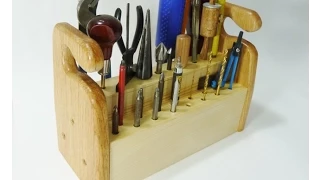
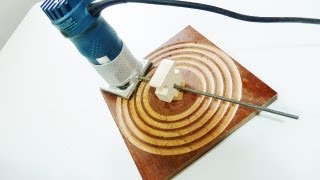
        Make a tool caddy                     Circle cutting jig                           Make a finger board


Friday, October 17, 2014

Scrap bin for my table saw


I find small scrap pieces always a nuisance when I am cutting so I built this Scrap bin collector.
It is attached with rare earth magnets to the side of my bandsaw and can also fit on the table saw. It has a slide on the bottom to release the scraps.


I use these plastic bins to save some of my wood
scraps I think I could use later. When the Scrap Bin  Challenge came up I am very prepared with all my  scraps..... better yet the project I  will be  making is a Scrap bin collector for my table saw and band saw.


To make the bin I will use a piece of 1/4"Baltic birch. I will cut the sides  1'x7".  I have used this wood before to make some other boxes and it does hold up really well.
A dodo is cut in each of the pieces, this
will be for a slide or gate for the bottom
 of the bin for quick release of the scrap wood.
 I clamped a block of wood to the sides and tested my dado with the sliding piece which will be my gate. I always test pieces before moving on to the next step.
                          
The frame can now be made so I used Table saw clamp to make sure everything was cut precisely.

 Some angles are cut for the frame, these will line up with the dado cut on the bottom of the box.


  The pieces are assembled, glued and clamped.
Some of the pieces on the side are sticking out, they can be trimmed neatly on the table saw after the glue has dried.

 Small backer blocks are glued in the box, this will be for the rare earth magnets.


Holes are drilled with a 1 1/8" Forstner bit
for the magnet cup. I used a support block
 so the backer blocks would not be pushed
out when I was drilling.
The magnets are epoxied and tapped
 in to make sure everything is flush.....again
using the support block.


I use my mini speed square to mark the slide length to be used as a gate. I also drilled some finger holes and slightly rounded the edges. This can be seen in the photo below.


The bin is attached to the base of

 my bandsaw. It can also be used on 
the table saw. It is easy to swap over 
and works  great for collecting 
those small pieces. When it is 
full pull the slide and  release all 
the scraps.


See also:


2x4 work bench                               Book ends                                    Leonardo Da Vinci cam hammer


Monday, October 6, 2014

Country Cabinet with wire mesh door


To build the a strong cabinet I used a sheet of 5/8" pine plywood, I cut the sides it 4 ' long and 18" wide. 

 With the same plywood I cut four pieces  18'x12' for the shelves and the top.


I set up all the pieces on a table and clamped them together temporarily  and used my dowel stop gauge to space the shelves.
Everything is ready for gluing, I used a couple of squares and slid the cabinet against the drawer to help keep things lined up.


For the backing I used white hardboard. This can be bought at any hardware store. It comes in 4x8 sheets and is white on one side and very useful for other projects.

With wire cutters I  cut wire mesh for the door. Before the mesh is installed the frame should be painted.


The cabinet is painted, mesh is stapled to the door and the hinges are  screwed on.


I grabbed some canned peaches to test my new cabinet. Everything turned out great!
Now it is ready to go into my kitchen and filled with preserves.


See also:


Let me know how you liked this build and if you want more of this type, please comment!