
A compass is often used as a symbol of precision and discernment.
-001.JPG "large wooden compass")
I like to use a compass for woodworking, the points
make it easy to get precise measurements and for
marking distances repeatably and very accurately.
How to Build a Large Wooden Compass !


I sometimes build a prototype to see if a project will work. I built the one shown here in about 15 minutes and was happy how it turned out, and know I was ready to build a larger one.
I will actually keep and use the smaller one because it works fine.
It will be another addition to my woodworking tools.


The head of the nails are cut off and pushed into the base of the legs with a pair of pump pliers.

couple of nuts are put on the ends to keep everything together.
This was a very simple woodworking project and one that I will
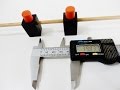
certainly use often. The reach is slightly over 1 foot. I really like
many different measuring tools and this one is a keeper. An easy
woodworking tool that can be made in less than 1 hour.
See Also:
Vacuum Hose Holder Make a Spray Can Rack Make a Dowel Stop Gauge


Jack,
ReplyDeleteAs always your designs are simple yet elegant.
Regards
Richard Jurdeczka
Sydney, Australia
Thanks for watching Richard, many more to come!
ReplyDeletevery perfect Jack ... i(m fan your channel Youtube end i'm french
ReplyDeleteThanks for stopping by Haucourt!
DeleteIt is a great piece of woodwooking.I really like this.As well as it is an fantastic tutorial of build a large wooden compass.Ye did a great job writing this blog post.
ReplyDeleteThanks for stopping by, I will keep making these post and share my ideas!
DeleteThanks for checking it out!
ReplyDeleteHi Jack, I'm with a small maker media called Makery (www.makery.info) and I'm just finishing up an article about DIY compasses. I would like to know if it was alright to use the pictures you took for this post in my paper, with full credit and a link to your blog of course.
ReplyDeleteI made one. Made a sector too to go with it. Thanks so much for your great tutorials and videos.
ReplyDelete65D0480A23
ReplyDeleteSkype Show
Sanal Seks
Görüntülü Show Uygulamaları
579A39CD
ReplyDeletegölcük esçort
esçort bayan eskişehir
keşan esçort
odessa esçort
muş esçort
antalya olgun esçort
esçort burdur
kapaklı esçort
yakuplu esçort
05282842
ReplyDeleteesçort trabzon
esçort bartın
anadolu yakası anal esçort
esçort tokat
narlıdere esçort
esat esçort
çanakkale esçort
malatya esçort numaraları
şile esçort